

How To Clean a House Professionally Step by Step – By Good Cleaner Co.
How To Clean a House Professionally Step by Step
Before we start, I have a few rules I always stick with:
- Organize and Clear Clutter first
- Always clean each room from top to bottom to prevent dust from settling on already cleaned surfaces.
- Dust and Vacuum thoroughly to remove hair, fur, sticky material
- Use microfiber cloths for dusting to trap particles effectively
- Tackle one room at a time for focused and efficient cleaning. I always tackle room with high traffic first such as kitchen, bathroom.
- Stay organized and keep cleaning supplies together and easily accessible. Trust me, this will save you a lot of time running back and forth
Step 1: Preparation and Organization is Key to Clean a House Professionally
Before diving into the cleaning process, it’s crucial to prepare and organize your tools and supplies. This step sets the foundation for an efficient and thorough cleaning session.
- Gather Essential Cleaning Products: Ensure you have all-purpose cleaners, disinfectants, microfiber cloths, scrub brushes, and a vacuum cleaner. Depending on your home, you might also need glass cleaner, floor cleaner, and specialized products for wood or stainless steel surfaces.
- Declutter Your Space: Remove unnecessary items from countertops, tables, and floors. This not only makes cleaning easier but also allows you to clean more effectively. Store items in their designated places or consider donating things you no longer need.
- Organize Cleaning Supplies: Keep all your cleaning tools and products together in a portable caddy or a designated cleaning closet. This saves you time by eliminating the need to hunt for supplies while you clean.
- Observe Your Surroundings: A good cleaner starts by taking a moment to observe the surroundings. This allows them to assess the space, identify areas that need extra attention, and locate where tools and supplies are situated. This step ensures a more efficient and effective cleaning process.
Step 2: Start from the Top
Professional cleaners always begin by tackling high surfaces first to prevent dust and debris from settling on areas that have already been cleaned. Starting from the top and working your way down ensures that you don’t end up wasting time by having to clean surfaces twice. For example, if you were to clean lower surfaces first, any dust or dirt from higher areas would inevitably fall and resettle, forcing you to redo your work.
- Ceiling Fans and Light Fixtures: Use a microfiber duster or an extendable cleaning wand to reach and clean ceiling fans, light fixtures, and corners of the ceiling. This step is crucial to prevent dust from falling onto cleaned furniture or floors.
- Shelves and High Surfaces: Dust shelves, the top edges of furniture, and other high surfaces. Be sure to move any items on the shelves to dust thoroughly, ensuring no dust remains to settle on lower surfaces.
- Walls and Window Sills: Don’t forget to dust walls and window sills, as these areas can accumulate dust and cobwebs. By cleaning them before moving to lower surfaces, you maintain the cleanliness of the entire space.
Step 3: Dusting and Vacuuming
Once the high surfaces are clean, focus on dusting and vacuuming all surfaces in each room. A good, thorough vacuum is essential before mopping to ensure that the mop can do its job effectively without spreading dirt or debris around.
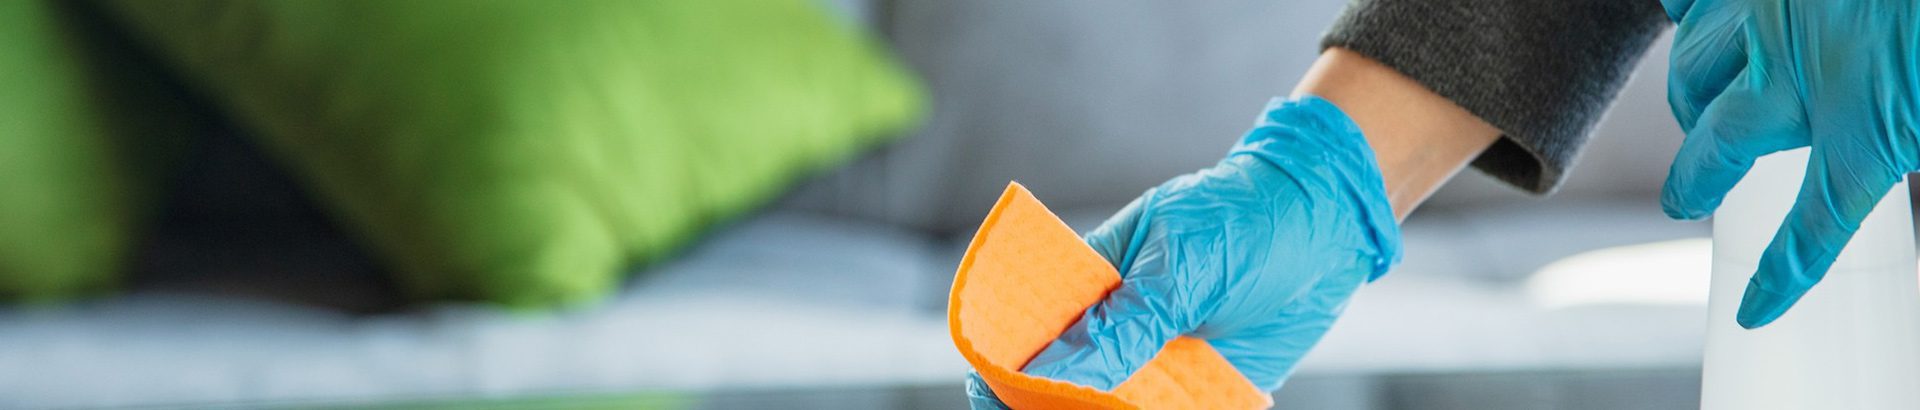
- Dusting: Use a microfiber cloth to dust furniture, countertops, and other surfaces. Pay special attention to hard-to-reach areas, such as the tops of door frames and behind electronics. Microfiber cloths are effective because they trap dust rather than just moving it around.
- Vacuuming: For floors, vacuum thoroughly to remove dirt, pet hair, and allergens. A good vacuuming is a must before mopping because it ensures that all loose dirt is removed. If any dirt or debris is left on the floor, it can get pushed around by the mop, leading to streaks and less effective cleaning. Use vacuum attachments to clean corners, baseboards, and upholstery. Ensure you vacuum under furniture and in any hidden spaces where dust might accumulate.
- Special Surfaces: If you have delicate or special surfaces, use appropriate dusting tools. For example, use a lambswool duster for delicate surfaces and a vacuum with a HEPA filter for allergy-sensitive homes. Proper vacuuming not only preps the floor for mopping but also ensures that the mop can clean deeply without getting clogged with debris
Step 4: Cleaning Surfaces
Once dusting and vacuuming are complete, it’s time to clean surfaces throughout the house. This step ensures that all visible dirt and grime are removed, leaving your home sparkling clean.
- Countertops and Tables: Use mild soap and water or an appropriate surface cleaner to wipe down countertops and tables. For kitchens, ensure you use a cleaner that can handle grease and food residues. Microfiber cloths work best as they trap dirt and leave a streak-free shine.
- Mirrors and Windows: Use a glass cleaner and a microfiber cloth to clean mirrors and windows. Spray the cleaner on the cloth rather than directly on the glass to avoid drips and streaks. Wipe in a circular motion to remove all smudges and fingerprints.
- Furniture: For wood furniture, use a wood cleaner or a damp microfiber cloth. Be gentle to avoid scratching the surface. For upholstered furniture, spot clean any stains with appropriate fabric cleaners.
- High-Touch Areas: Don’t forget to clean high-touch areas like light switches, door handles, remote controls, and electronic devices. Use disinfectant wipes or a cloth dampened with a disinfectant solution to ensure these areas are germ-free.
Step 5: Deep Clean Bathrooms and Kitchens
While bathrooms and kitchens are often the dirtiest areas of the home and require extra attention, it’s important to approach these spaces strategically. I don’t start by deep cleaning the kitchen or bathroom first. Instead, I focus on ensuring that the external, high-traffic areas are clean and organized before diving into the more intensive deep cleaning tasks. This approach helps maintain overall cleanliness and ensures that I’m not spreading dirt or dust into areas I’ve already cleaned.
- Showers and Bathtubs: Use a bathroom cleaner and a scrub brush to remove soap scum and mildew from showers and bathtubs. Pay extra attention to grout lines and corners, but only after ensuring the external surfaces are tidy.
- Sinks and Toilets: Clean sinks and toilets with a disinfectant cleaner. Use a toilet brush to scrub the inside of the toilet bowl, and a cloth to wipe down the exterior surfaces. Make sure the external areas are presentable before diving into deep cleaning tasks like scrubbing grout or tackling stubborn stains.
- Kitchen Appliances: When it comes to kitchen appliances, I ensure the kitchen’s external surfaces are good first. Then, I thoroughly clean the stovetop, oven, microwave, and refrigerator. I use a degreaser for the stovetop and oven, and a mild cleaner for the interior of the refrigerator. Removing and cleaning refrigerator shelves and drawers helps eliminate spills and odors, but this comes after the general tidiness of the area is assured.
- Disinfect High-Touch Surfaces: I disinfect high-touch surfaces like faucets, cabinet handles, and doorknobs after the external areas are in good shape. This step is crucial for maintaining a hygienic environment, ensuring that deep cleaning efforts are not undermined by overlooked areas.
Step 6: Final Sweeping/Vacuuming and Mopping
After cleaning surfaces, it’s time to finish with sweeping or vacuuming, followed by mopping to ensure all remaining dirt and grime is removed.
- Hard Floors: Start by sweeping or vacuuming hard floors to remove loose dirt and debris. This step is crucial to ensure that the mop doesn’t just push around dirt. After sweeping or vacuuming, mop with a mild cleaning solution. Be mindful not to use too much water, especially on wood floors, to prevent damage. Choose a mop that is appropriate for your type of flooring.
- Carpeted Areas: For carpeted areas, perform a final vacuuming to ensure a thorough clean. Focus on high-traffic zones and areas where dirt tends to accumulate. Use a vacuum with strong suction and the right attachments for a deep clean.
- High-Traffic Areas: Pay special attention to high-traffic areas and any spills. These spots may need extra care, possibly with a spot cleaner, to remove stubborn stains effectively.
Step 7: Final Touches and Inspection
To complete the professional cleaning process, perform final touches and inspect your work to ensure no areas have been overlooked.
- Wipe Down Remaining Surfaces: Wipe down any remaining surfaces, such as light switches, door handles, and baseboards, with disinfectant wipes or a cloth dampened with disinfectant solution.
- Inspect Each Room: Take a moment to walk through each room and ensure that no areas have been missed. Look for spots, stains, or areas that might need additional attention.
- Address Lingering Odors and Stains: Address any lingering odors by using air fresheners, scented candles, or by opening windows to air out the space. For stains, use spot cleaners to remove them effectively.
- Maintenance Notes: Make note of any maintenance tasks that need to be addressed in future cleaning sessions, such as replacing filters, fixing leaky faucets, or deep-cleaning carpets.
Step 8: Optional – Scent and Ambiance Enhancement
While a clean home is essential, adding a pleasant scent and enhancing the ambiance can elevate your living space to the next level. This optional step focuses on creating an inviting atmosphere that appeals to all the senses.
- Aromatherapy: Use essential oils or diffusers to fill your home with refreshing and relaxing scents. Lavender, eucalyptus, and citrus are popular choices that can create a calming and invigorating environment.
- Fresh Flowers and Plants: Incorporate fresh flowers and indoor plants to add a touch of nature and beauty to your home. Not only do they look great, but they also improve air quality and create a welcoming atmosphere.
- Soft Lighting: Adjust your lighting to create a warm and cozy ambiance. Use dimmers, candles, or string lights to add a soft glow to your living spaces. This can make your home feel more inviting and comfortable, especially in the evenings.
- Music and Sound: Play soft background music or use a white noise machine to create a serene environment. The right soundtrack can enhance your mood and make your home feel like a sanctuary.
- Personal Touches: Add personal touches like neatly arranged books, art pieces, or family photos to make your home feel uniquely yours. These elements can enhance the overall ambiance and make your space more enjoyable.
For DIY scent solutions, check out our Good Cleaner Co DIY Scent Guide to craft your own personalized, refreshing fragrances that perfectly suit your home.
